You can create a new, free account on Cloudinary by adding +training to your email when registering.
Sign up here
For example, I can create an account with this email:
[email protected]
This is important, as we’ll be configuring settings and using Cloudinary add-ons.
We’ll be coding in Node.js (v > 10.x), as well as creating some HTML/JavaScript/CSS files.
Install the latest version of node/npm to follow along with node exercises. Download node.js and npm
You can update node/npm with this command: npm i npm@latest -g

I’ll be using Visual Studio Code with the Live Server extension to serve HTML files on localhost.
Another alternative to using the VS Code live server extension is to npm i -g http-server and open the server from the terminal with npx http-server.
The code repo is here
The easiest way to work with this repo is to download it. Most of the work will involve running local node.js scripts or serving from localhost.
This repo contains code and assets used during the exercises. You'll find assets under the assets and secure-assets directories. *The files can be served from github.io. This is useful when we’re working on modules like auto-upload/fetch. For example:
https://cloudinary-training.github.io/cld-advanced-concepts/assets/images/cc0.png
(Optional) If you want to serve your account repo on github.io, I recommend forking or duplicating this repository into your own GitHub account. Forking allows you to pull from upstream later if you want. Go to Settings and set up gh pages to serve the HTML files.
Your .env file is .gitignored and can’t be accidentally checked into a repository
because it will contain your API_SECRET.
In the root of the project, you’ll find a .env.template file.
Copy it to an .env file and add your information:
cp .env.template .envThis link will take you to the Console, where you can copy the Cloudinary URL into your buffer: https://www.cloudinary.com.
The .env file should contain the CLOUDINARY_URL and a USER_NAME which is the email you used to sign up for the account.
CLOUDINARY_URL=<cloudinary URL from console>
USER_NAME=<cloudinary account email>See the .env.template for example of what is needed as described above. Before running any scripts you need to run npm install in the terminal in the directory containing the package.json.
You may want to run npm install in all the subdirectories prior to starting the course. This can guarantee you are ready if you are accessing the course in a network where npm install may be blocked. These are the directories that contain a package.json and need the npm install:
- signing-widgets/bonus
- signing-widgets/server
- user-upload-workflow/remote-functions
- video-player/vuejs
All scripts (unless otherwise noted in a module) can be run from the root of the project in the terminal.
If I want to run a script in the /access-control directory to upload a private asset, I can run it from the terminal like this from the root directory:
node access-control/private/upload-private.jsTest that your environment variables are setup correctly:
node test-env.jsTest that you can upload assets:
node test-upload.jsWe use the JavaScript vue.js framework in the module on Video Player, as questions come up about how to include widgets and player in frameworks. The code in the vue.js example is very similar to what you would use in a static HTML page. The code for React and Angular is similar, but those frameworks often require typescript, which can make the code more complex.
To get the vue.js code running, you’ll need to install the Vue CLI, which will allow you to start a local server to run the code. Vue CLI Installation Instructions here
You will run npm install -g @vue/cli.
Note: You’re not installing Vue.js globally, just a package with the CLI
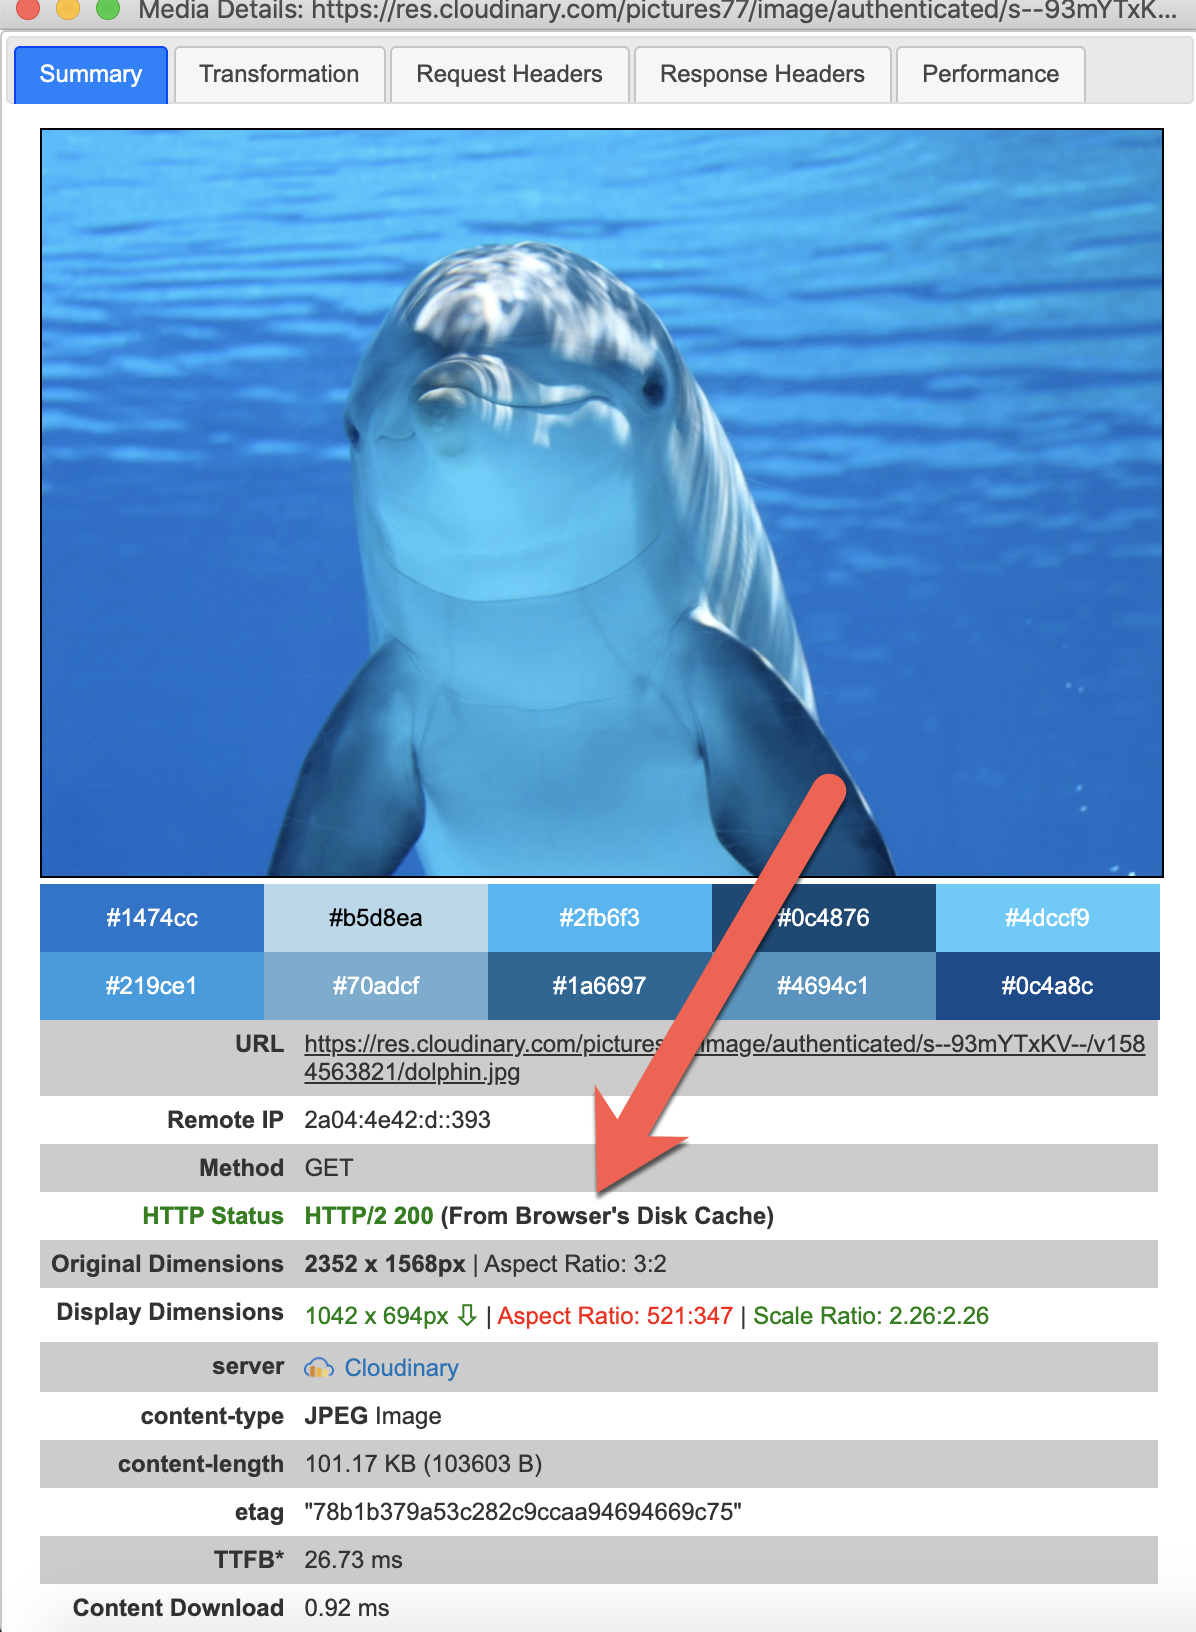
In this course, we’ll be concerned about browser caching and CDN caching. Understanding the flow of requests through the CDN and into Cloudinary’s system storage will help. It’s also helpful to be able to identify if you are caching in the CDN and to eliminate browser caching.
You can use the Cloudinary Debugger Chrome Extension to detect browser caching.
To avoid browser caching, you can
- check the disable cache and keeping the chrome inspector open,
- find an extension that prevents browser caching
- open your image requests incognito (Chrome) or private (Firefox)

You can purge a fastly cache with this command:
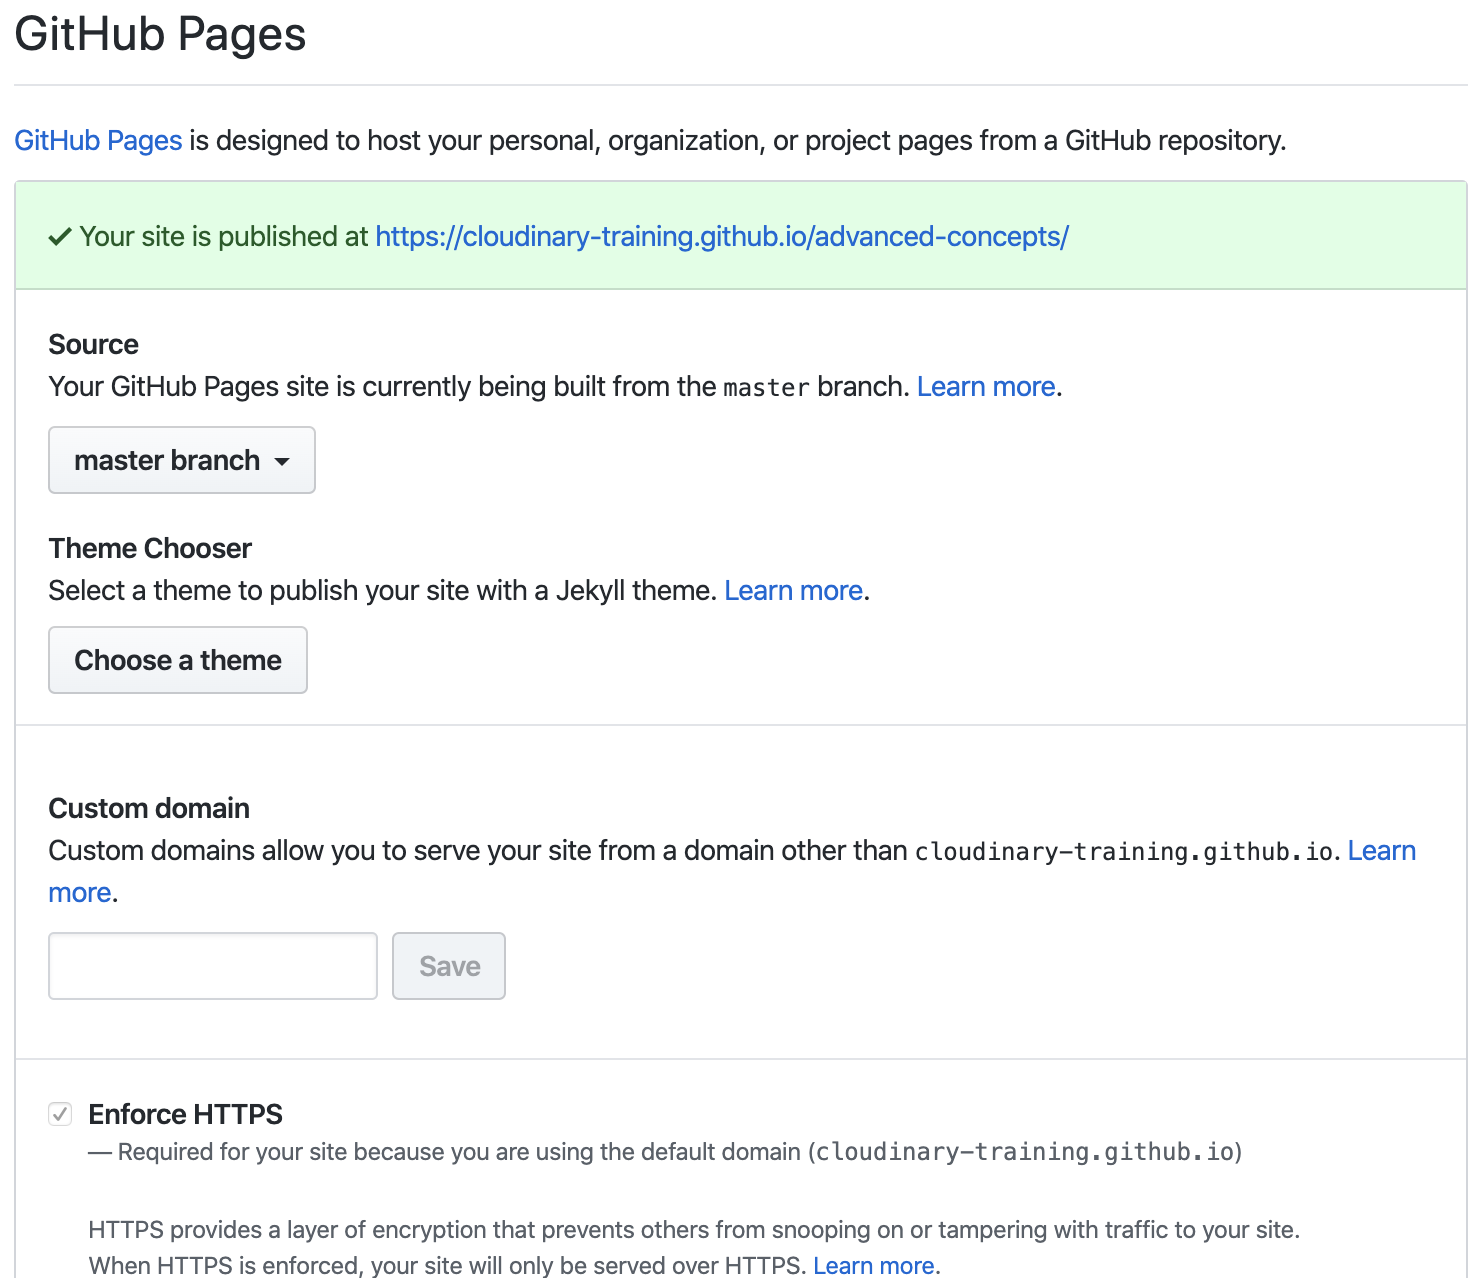
curl -X PURGE https://www.example.com/image.jpgIn github.com settings: -- Choose master branch for the source. -- Click Enforce HTTPS if you have the option available. You can also serve assets from the training github account: https://cloudinary-training.github.io/cld-advanced-concepts.
VS Code Node Debug: optional
Simple breakpoint debugging
-- Enable Debug > Node: Auto Attach
-- Set breakpoints
-- In terminal node --inspect <filename>

If you want to remove all assets from your cloud that were uploaded in this course,
you can find cleanup scripts in the /utils directory
There are some instances where serving from localhost will not work correctly because XHR is used and there can be bugs around this, such as this one in chrome: https://bugs.chromium.org/p/chromium/issues/detail?id=67743 Links are provided to serve from the Advanced Concepts Server https://cloudinary-training.github.io/cld-advanced-concepts--- title: "Code Formatting" metaTitle: "Code Formatting" metaDescription: "Code Formatting"
This repo uses prettier for formatting. If you're using Visual Studio Code you can add the prettier extension. You can also rename the .prettierrc.suggest to the hidden file .prettier to use the rules followed in formatting the code in this repo.
Contents of .prettier below
{
  "singleQuote": true,
  "tabWidth": 2,
  "semi": false,
  "arrowParens": "avoid",
  "space-before-function-paren": true
}